Your plan sets what you get — how many Clones and channels it includes, how many units you get each month, and which knowledge-source types and integrations are unlocked. Changing plan is self-service, and there are two places to start it: the Your plan section of your account settings, and the Plans page where every tier sits side by side. This guide shows both, plus the yearly-billing saving and what happens once you confirm.
Compare the plans first — units, Clones, channels and knowledge sources are laid out tier by tier in Comparing plans. This guide assumes you already know the plan you want and just need to switch to it.
Change plan from your account settings
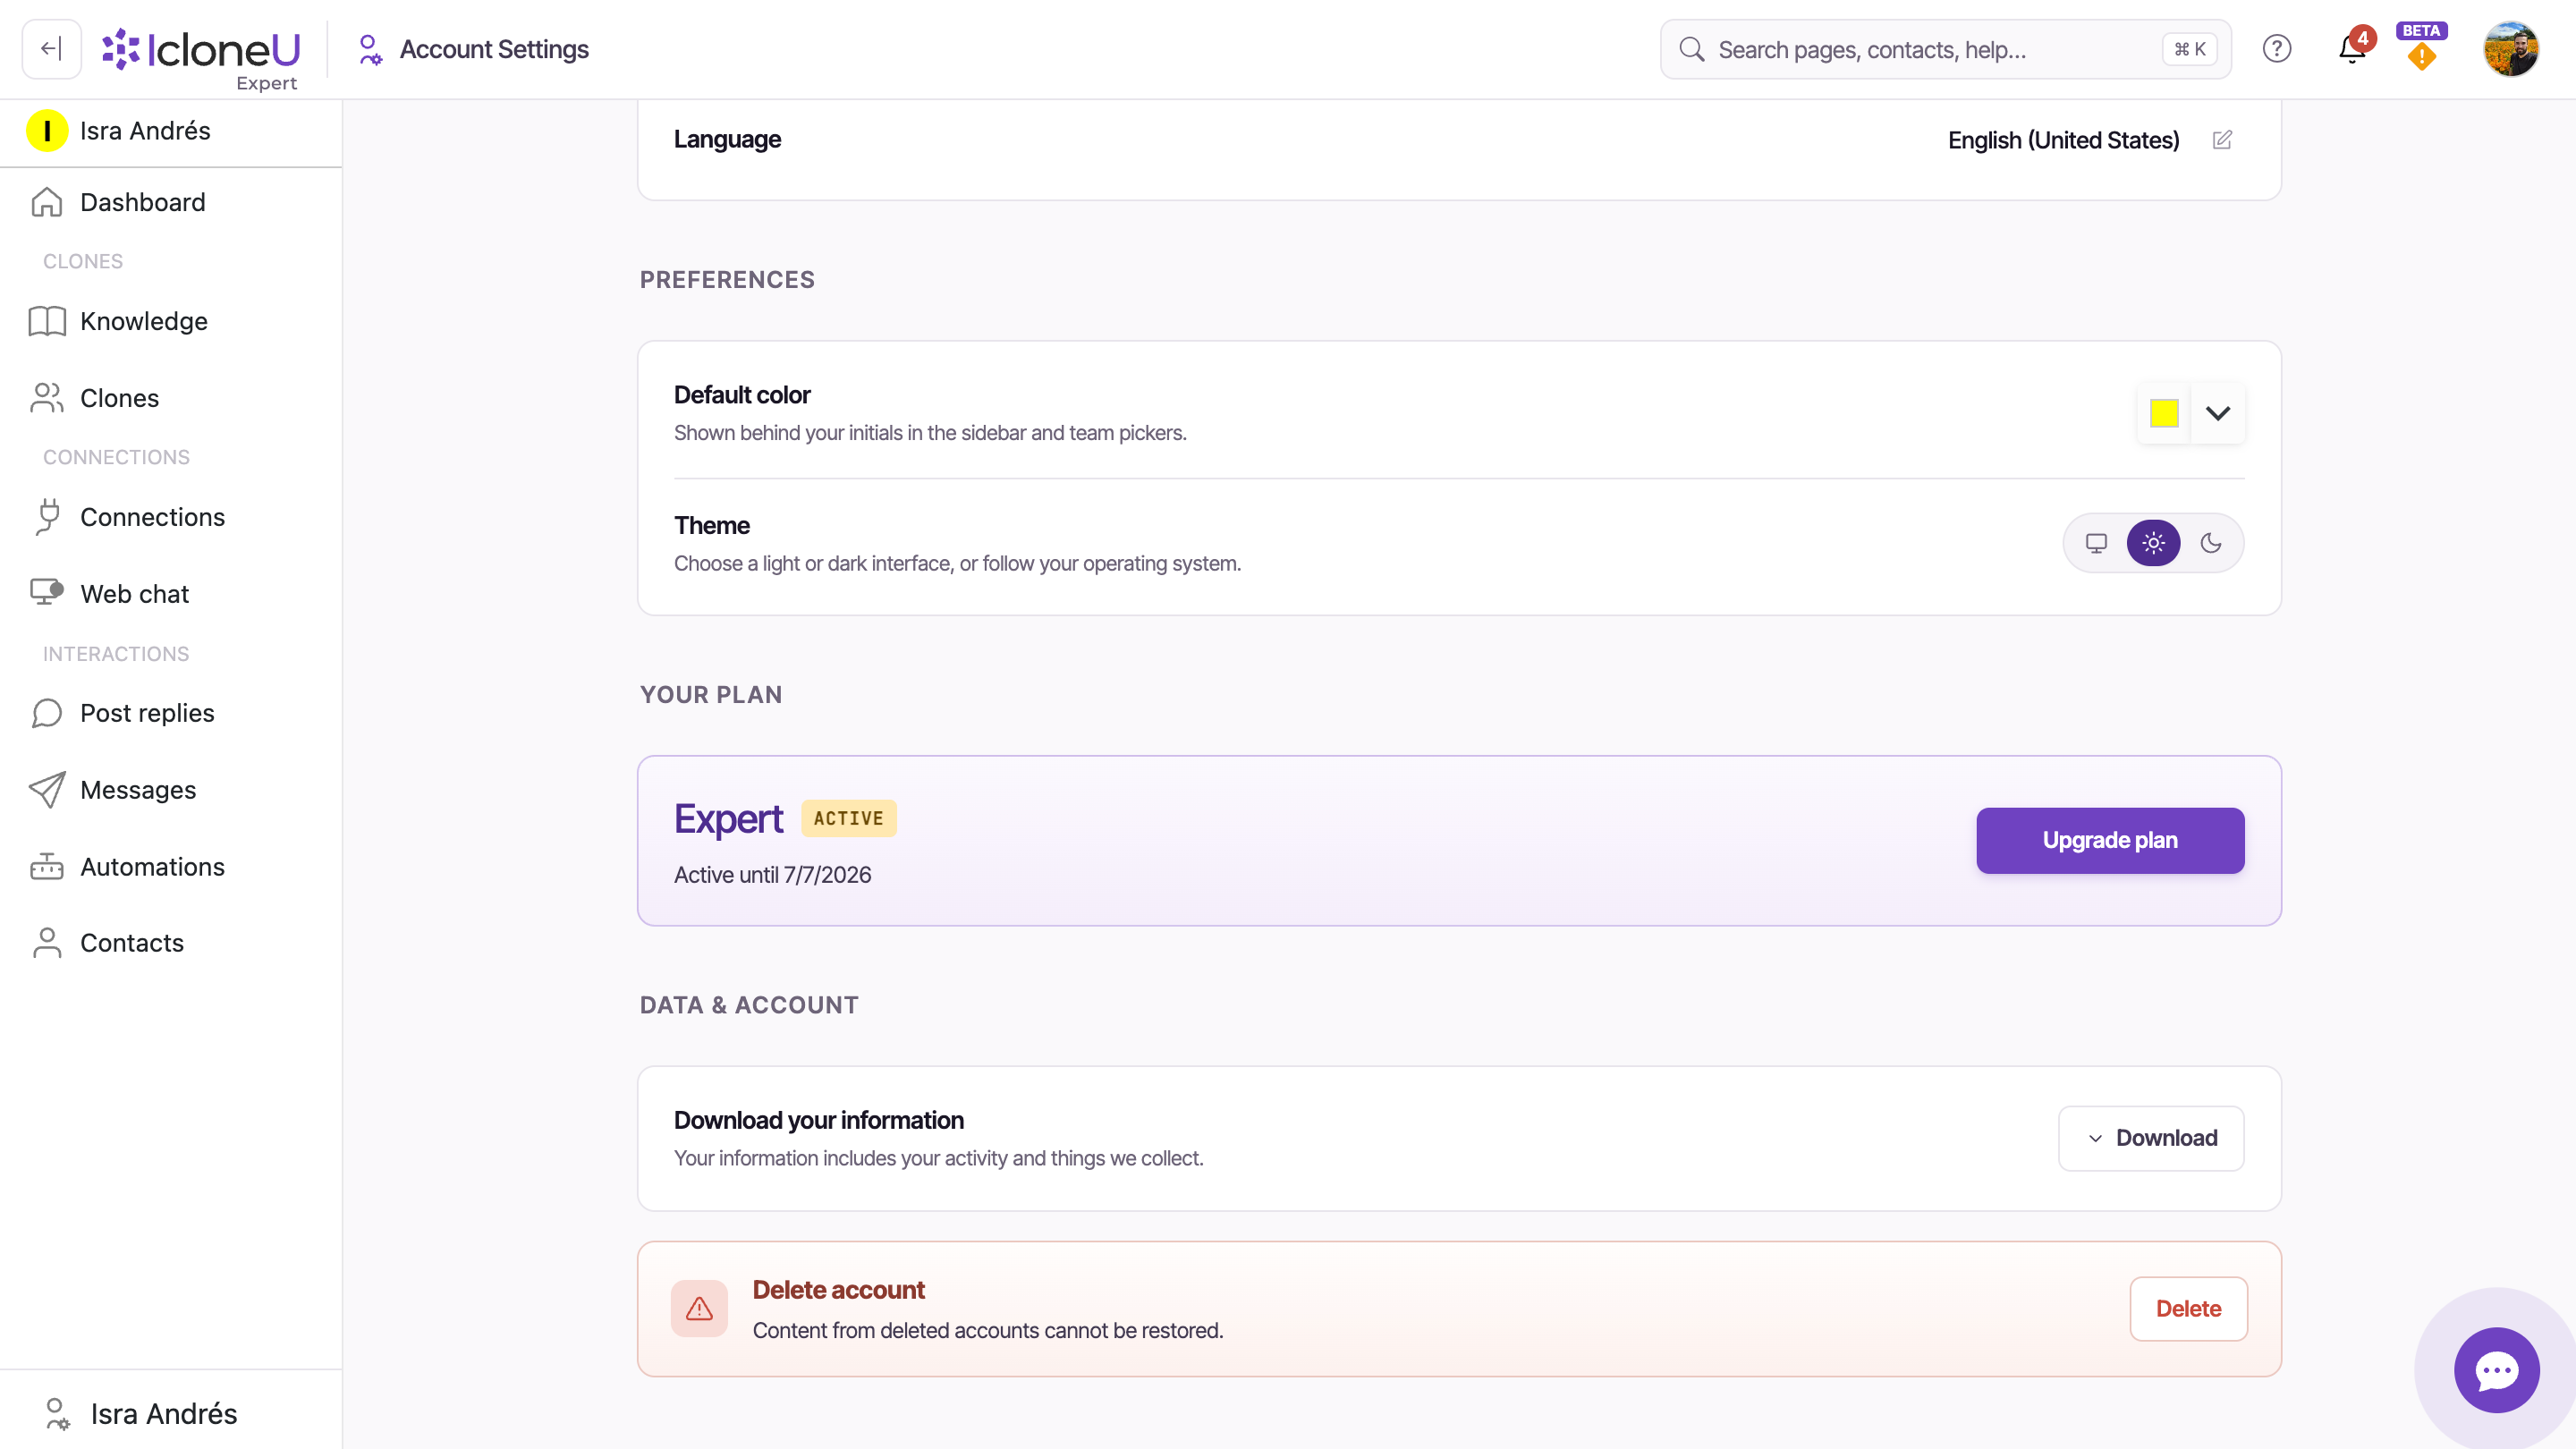
The quickest route is the Your plan card inside your account settings — it shows the tier you're on now, so it's a natural place to step up from.
Open Account settings
Click your avatar in the top-right corner and choose Account settings from the menu (the same menu also has a Plan shortcut that jumps straight to the Plans page — see the next section).
Stay on the Your details tab
Account settings opens on the Your details tab. Scroll down past your profile to the Your plan section.
Read your current tier
The Your plan section names your current tier with an ACTIVE badge and an Active until date — the date your plan is paid through. This is your authoritative plan-expiry date.
NoteBoth the Dashboard's Active until chip and this Your plan date show the same plan-expiry date. The separate units-cycle reset date is shown on the Billing tab, in the Plan units remaining box as a Resets … line.
Click Upgrade plan
Select Upgrade plan. This takes you to the Plans page (covered next), where you pick the tier you want and confirm. Despite the button's name, the Plans page is also where you step down to a smaller tier.
Change plan from the Plans page
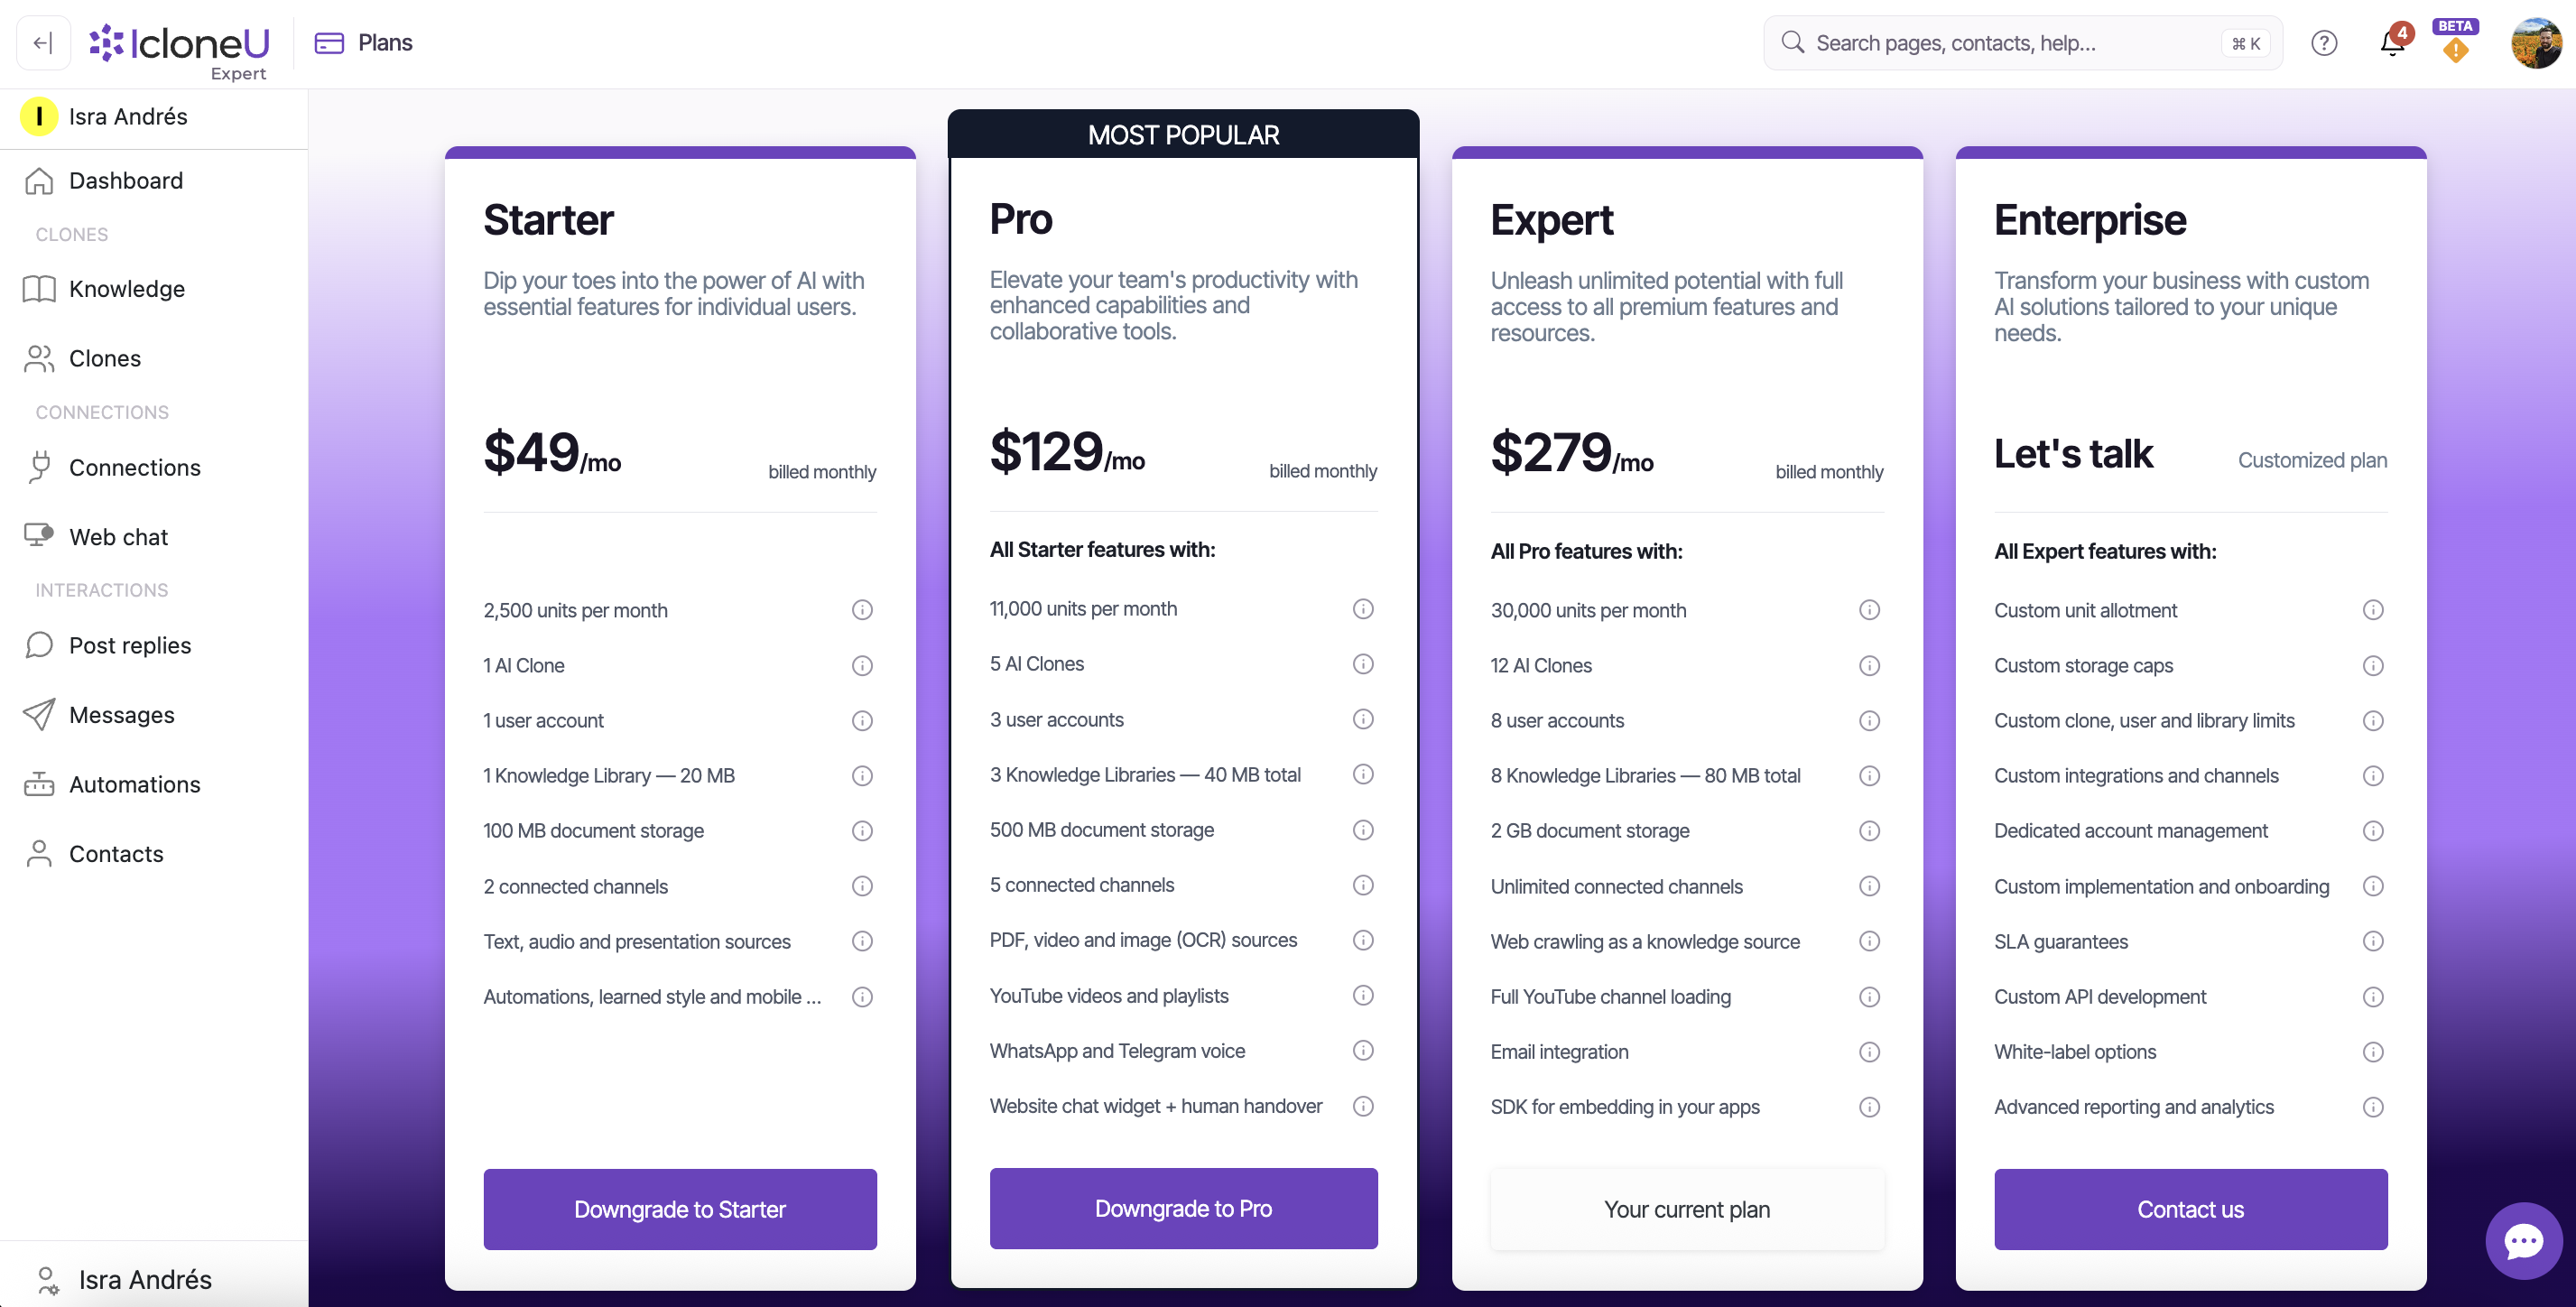
The Plans page lays out every tier — Starter, Pro, Expert and Enterprise — side by side, with your current one clearly marked. It's the place to go when you want to see what each tier includes before committing, and it's where both upgrades and downgrades are confirmed.
Open the Plans page
Reach it from Upgrade plan in your account settings, or directly from the Plan item in the avatar menu.
Find your current plan
The tier you're on is labelled Your current plan, so you always know your starting point. The Pro tier also carries a Most popular badge.
Pick the tier you want
Each card lists what that tier includes and an action button. A tier above yours offers an upgrade; a smaller tier shows a Downgrade to Starter or Downgrade to Pro button. Enterprise is a custom plan — instead of a price it shows Let's talk with a Contact us button to reach the team.
Confirm the change
Selecting a plan starts the change. You'll be guided through the billing step from there — see What to expect after you confirm below.
Monthly or yearly billing
Above the tier cards is a Monthly / Yearly toggle that flips every price between the two billing cycles. Yearly is the cheaper way to pay: the toggle advertises a saving (the page shows a Save $138+ hint), and each card's price line switches to a billed annually figure when Yearly is selected.
| Tier | Monthly | Billed annually |
|---|---|---|
| Starter | $69 / mo | $690 / year |
| Pro | $199 / mo | $1,990 / year |
| Expert | $449 / mo | $4,490 / year |
| Enterprise | Custom — Let's talk | Custom — Let's talk |
Flip the toggle to Yearly before you confirm if you want the annual saving — paying for twelve months up front works out cheaper than the same plan billed month to month.
What to expect after you confirm
If your card requires it, the checkout runs your bank's 3-D Secure confirmation right in the app — a bank window opens, you approve, and the change continues. It isn't an error; just complete the check.
Once you pick a plan, IcloneU guides you through the billing step — confirming the price for your chosen cycle and charging your default payment method. We're keeping this part deliberately high-level: the exact payment screen, any mid-cycle proration, and the precise moment a change takes effect can vary, so treat the points below as orientation, not a quote.
- Upgrades generally give you what the bigger plan includes — more units, Clones, channels and integrations — once the change is confirmed and billed. Exactly how the first charge is calculated is shown to you at the billing step.
- Downgrades move you to a smaller plan that includes less. The platform's own wording describes a downgrade as continuing your current plan until it runs out before the smaller plan's pricing takes over — so you typically keep what you've paid for through the period you've already paid. The precise dates and amounts are confirmed on screen.
- Your data stays put. Changing tier doesn't delete your Clones, libraries or connections. A smaller tier includes fewer of them, as the Plans page lists them, and fewer units each month.
Because the effective date and any proration are settled at checkout, the billing screen is the source of truth for what you'll be charged and when the change lands. Read it before confirming rather than relying on a figure quoted here. For the cards on file, see Managing payment methods.
Frequently asked
Two places lead to the same Plans page: the Upgrade plan button in the Your plan section of Account settings → Your details, or the Plan item in the avatar menu. On the Plans page you pick the tier and confirm.
Use the same Upgrade plan button to reach the Plans page. There, smaller tiers show a Downgrade to Starter or Downgrade to Pro button — downgrading is confirmed from the Plans page, not from a separate control.
Yes. Switch the Monthly / Yearly toggle on the Plans page to Yearly and each price updates to a billed annually figure — the page flags a Save $138+ saving versus paying month to month.
That's confirmed at the billing step, which we don't walk through here. Effective timing and any proration are shown on the checkout screen for your specific change — read it before you confirm. For the card that gets charged, see Managing payment methods.
Changing plan doesn't delete your content. A smaller tier includes fewer Clones and libraries, as the Plans page lists them.
Last updated September 23, 2026 · Plans & Billing