The Tell us about you wizard is the recommended first-run step after sign-up. It walks you through four short panels — Welcome, Business, Audience and Customer interactions — and uses what you enter to set sensible defaults for any Clone you create. It is not the same thing as your account name (the dashboard greeting), which you change separately on the same page. This guide walks each step, what it asks, and how to skip or re-enter it.
Completing the wizard is the faster path if you want IcloneU to pre-tune your Clones for your business, but the product works fine without it. You can leave at any step with Skip for now, and a new Clone will simply start with generic defaults instead of your business-tuned ones.
Where to find it
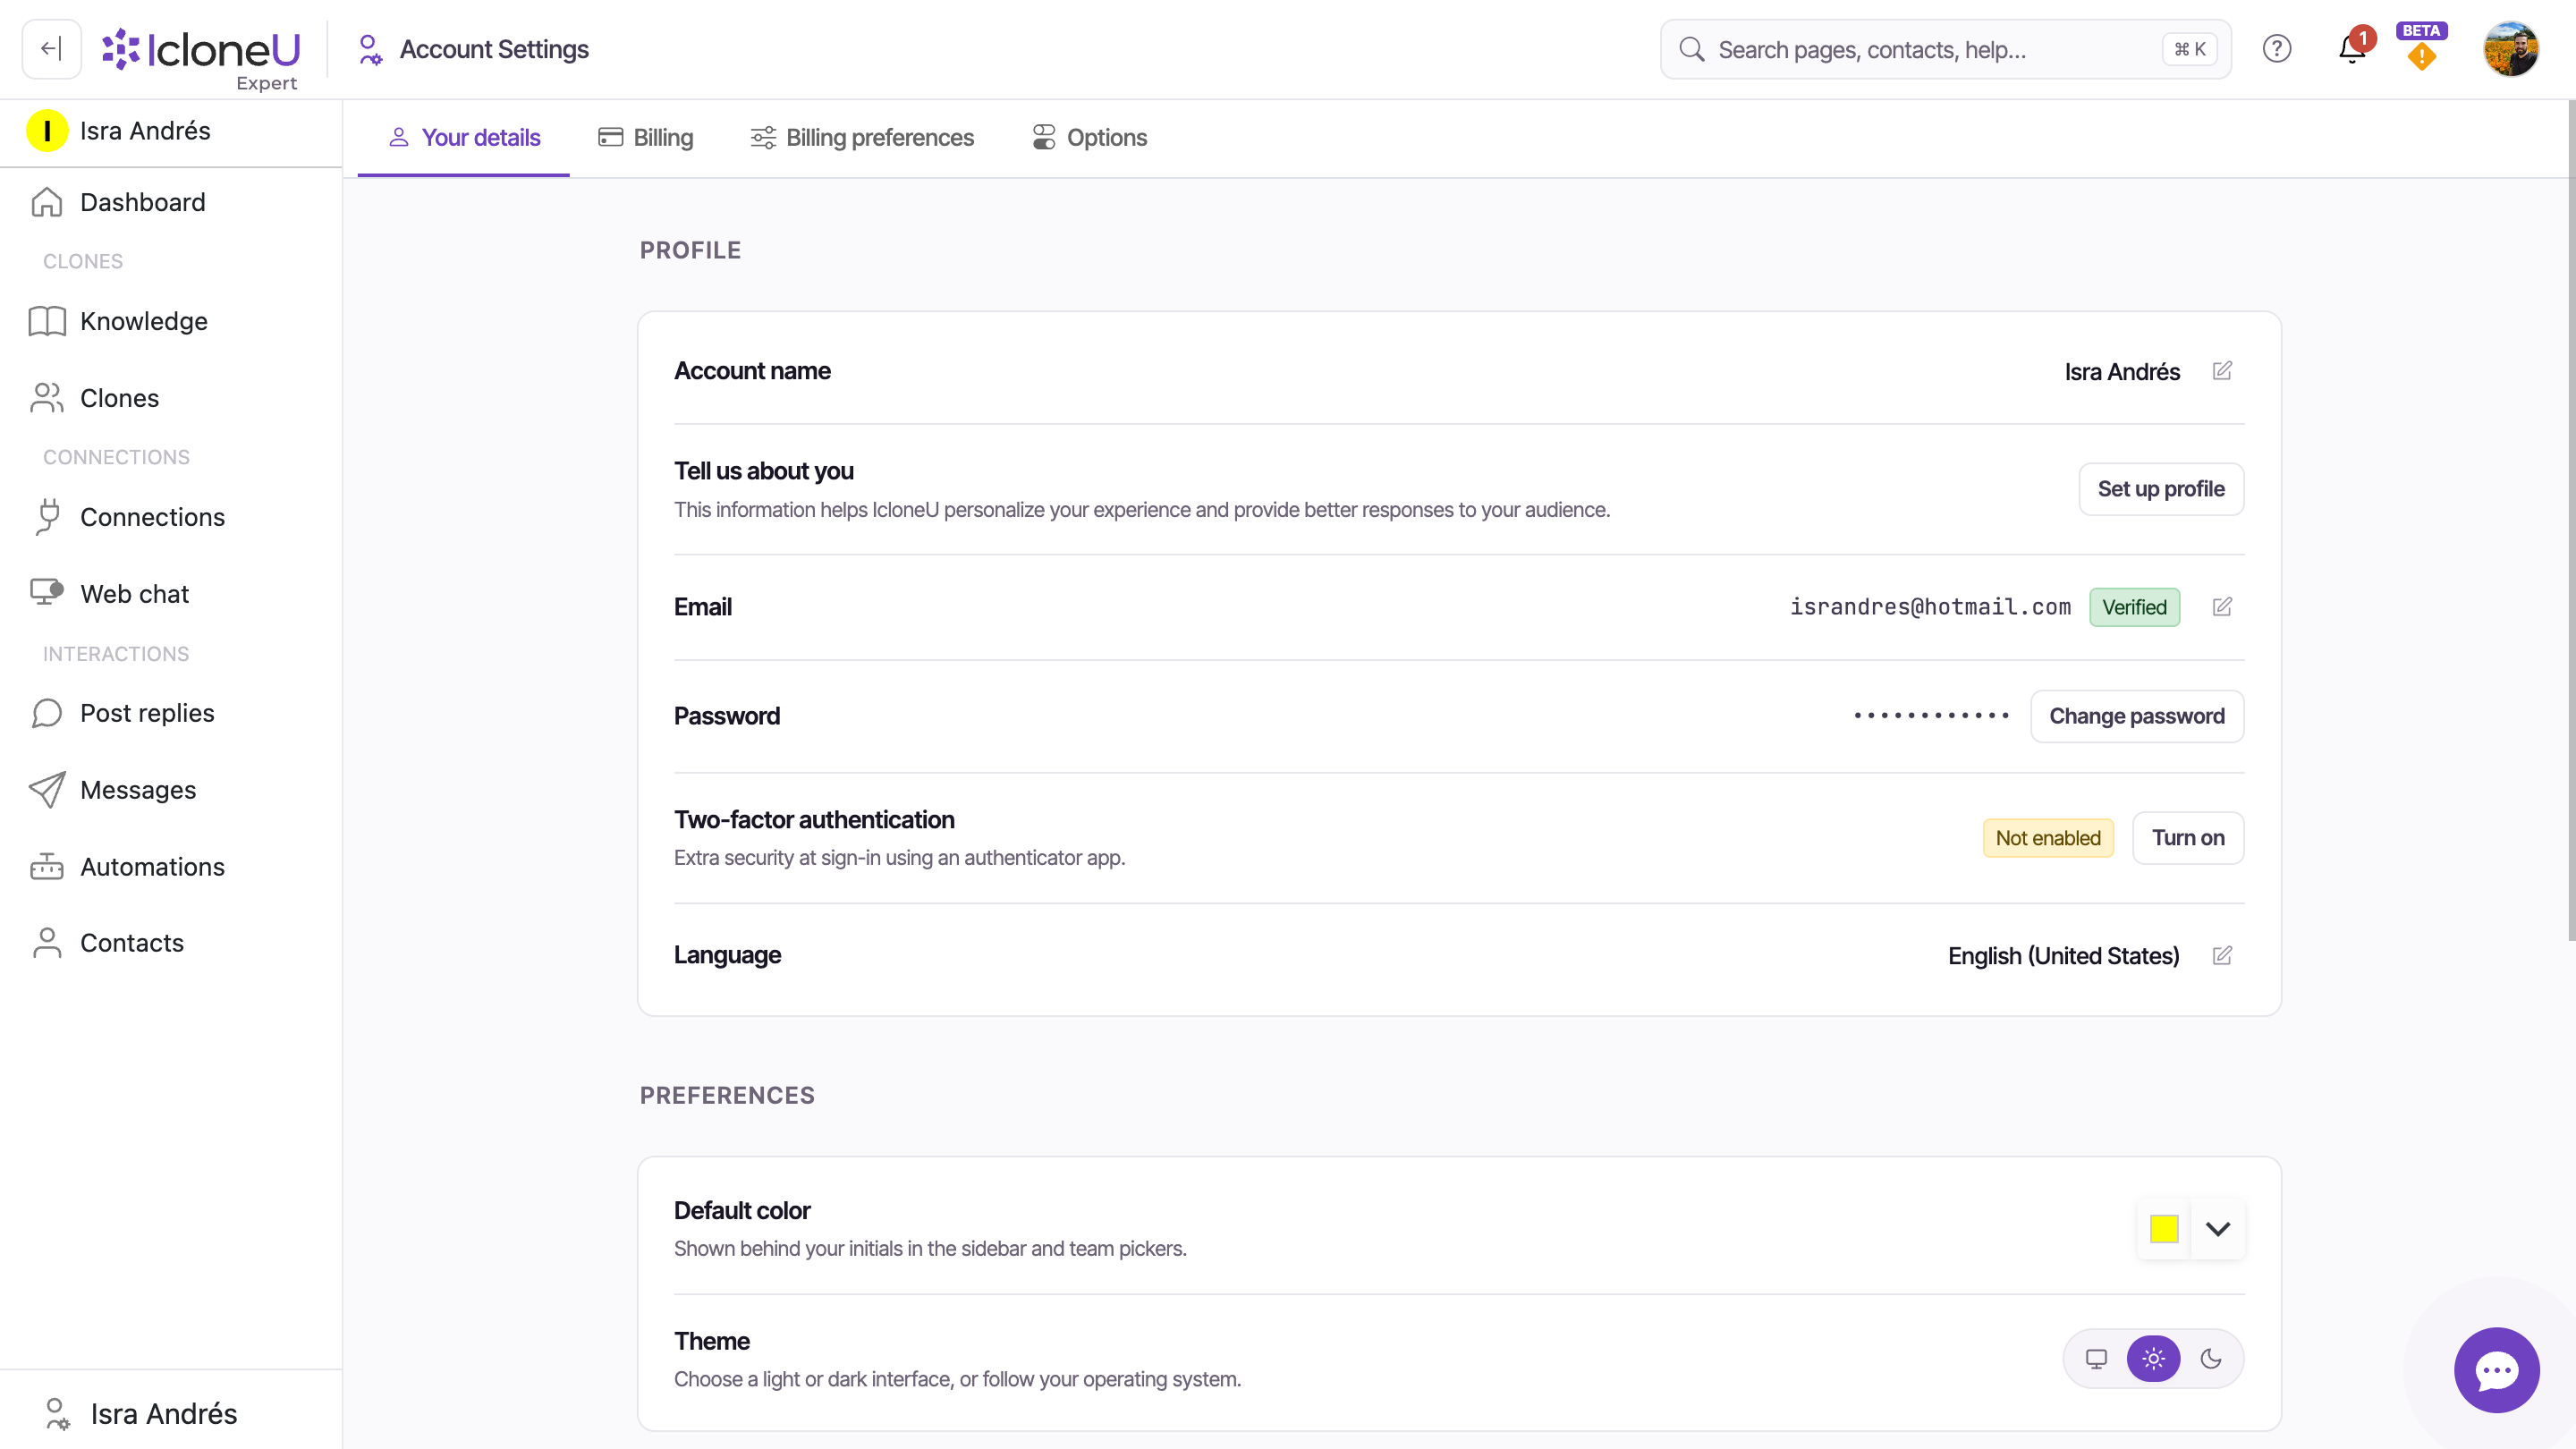
For a brand-new account, a Tell us about you banner sits at the top of Account Settings → Your details, with the subtext "This information helps IcloneU personalize your experience and provide better responses to your audience." Click the Set up profile button to open the wizard.
The wizard opens as a modal with a step rail down the left side, labelled Profile setup, and the four steps listed in order. The footer carries three operational hints — ~4 min to complete, Auto-saved as you go and Edit anytime in Settings — plus a progress bar.
The banner stays on Your details until you fill in your Company name (the first field in Step 1). After that it disappears, but the wizard stays reachable from the same page — the Tell us about you row under the Profile section keeps a Set up profile button. Reach it via the avatar dropdown → Account settings → Your details.
Step 1 — Welcome
The first panel is titled Welcome to IcloneU! and reads "Just a few minutes of your time helps IcloneU learn your voice and audience, so we can respond just like you would!" It collects your profile picture and the basic identity and location of your business.
Add a profile picture
Use the Add a profile picture card to upload an image. Its note is explicit about what the picture is — and what it isn't: "This is your account photo. The picture your customers see next to a clone's replies is uploaded separately, in that clone's Identity tab. Square images, at least 400×400px." Unlike the rest of the wizard, the picture saves as soon as you upload it.
Fill in Identity
Under the Identity section, enter your Company name, Phone and Website. All are optional free-text fields.
Set your Location
Under Location, pick your Country and State, and type your Main city.
Continue
Click Continue to move to step 2. The progress bar advances and the rail marks step 1 done.
Step 2 — Business
The second panel, Your Business ("Tell us about your business"), is about what you do, who you serve and what's getting in your way. It groups its fields into three sections.
| Section | Fields |
|---|---|
| About the business | Business type, Area of expertise, Offering |
| Goals & obstacles | Main objective, Response obstacles, Main obstacle |
| Reach | Main followers, Audience distribution |
Most fields here are "Select or type…" comboboxes — open the list and choose a suggestion, or just type your own answer if none fits.
Step 3 — Audience
The third panel, Your Audience ("Help us understand your audience better"), captures who your audience is and what they consume. Two sections:
| Section | Fields |
|---|---|
| Who they are | Knowledge level, Audience goal, Audience interests |
| What they consume | Audience content, Audience inspiration, Audience phrases, Shared resources, Audience influencers |
Step 4 — Customer interactions
The last panel is Customer's Interactions ("Tell us about your customer interactions") — how and when you reply to your customers. A help note at the top sets expectations: "Your clone learns from the ratings, notes and edits you make to its replies — your corrections are folded into its instructions within a day."
Common questions · top 3
Pick from the Common questions multi-select, then write up to three of the questions you get most often in the three numbered free-text fields.
Response behavior
Set how you handle replies: Different content (whether you vary content by social network), Respond personally, Response time and Response schedule.
Finish setup
On this last step the primary button reads Finish setup instead of Continue. Click it to close the wizard and save your profile.
The wizard's output feeds the defaults a Clone uses for tone, vocabulary and audience-segmented instructions. It does not, by itself, finish a Clone — you still configure each Clone on the Clones page. See Creating and configuring an AI Clone.
Saving, skipping and re-entering
Anything you type is saved when you close the wizard (the picture is the exception — it saves the moment you upload it), so a half-finished profile is kept and pre-filled next time. If you leave mid-step, your entries stay saved, and they're pre-filled when you reopen the wizard — which always reopens at Step 1 (Welcome), not where you left off. There are two ways out at any point:
- The Skip for now link at the bottom-left of the footer — closes the wizard without finishing the current step.
- The × in the wizard header — same effect; closes the wizard.
Merely opening the wizard and clicking through the steps doesn't save anything — only fields you actually fill in are persisted. If you close every step untouched, the Tell us about you banner stays put and your account is unchanged.
What the wizard does — and doesn't — do to your Clones
Your answers are saved to your account profile. From there, two things happen — and one deliberately doesn't:
- Billing follows your Country. The country you pick determines your billing currency and tax treatment and syncs to your billing profile.
- New Clones start from your answers. When you create a fresh Clone, the wizard's profile seeds it: your company name can become its starting Display name, your industry is applied, and a context block built from your answers lands in its instructions — so a brand-new Clone already sounds like your business.
- Existing Clones are never touched. Editing the wizard later doesn't rewrite any Clone you already have — each Clone is configured on the Clones page, on its own tabs.
There's no undo button: closing the wizard writes your profile as it stands. If you cleared a field by accident, reopen the wizard and type it back.
Not the same as your account name
The wizard collects your business and audience profile — it does not set your account name, which is the dashboard greeting and team-picker label. Your account name is its own field on Account Settings → Your details, under the Profile section, and it defaults to your email until you change it. Edit it there with the pencil button next to Name, separately from the wizard.
Frequently asked
No. It's optional. Click Skip for now at the bottom of any step and the product still works — new Clones simply start with generic defaults instead of your business-tuned ones. You can also set Industry, Primary language and Personality directly on each Clone's tabs if you prefer to configure them manually.
The wizard doesn't force any field — every field is optional, and you can move between steps freely using the rail or the Continue / Back buttons. The more you fill in, the better-tuned the Clone defaults, but nothing blocks you from finishing with fields left blank.
Go to the avatar dropdown → Account settings → Your details. While the banner is still showing, click its Set up profile button; once the banner has hidden itself, use the Set up profile button on the Tell us about you row under Profile.
No — those are separate. Your account ships with one Clone pre-created on sign-up (named Expert 1 by default); the wizard just pre-tunes the defaults it and future Clones use. To configure or add Clones, open the Clones page. See Creating your first AI Clone.
Last updated August 5, 2026 · Getting Started